news
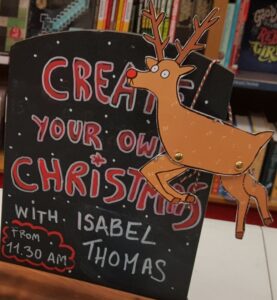
Create Your Own Christmas

 Bloomsbury, 2017 • Illustrated by Katie Abey
This is my Christmas activity book with Katie Abey, packed with science and art projects that use the pages of the book!
When the new pandemic restrictions were announced in the UK on 20 December, I immmediately thought of how difficult it will be for families to get hold of those little stocking fillers that make Christmas morning full of wonder. So I’ve adapted a few of the ideas in the book into activity toolkits you can put together from stuff you already have in the house, and slip into a stocking.
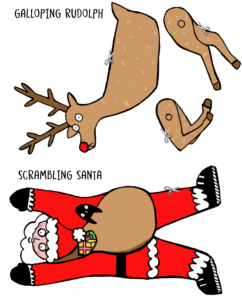
Download reindeer and Santa templates
Scrambling Santa
What to put in the kit:
Santa template – drawn or printed on to thin card (an old cereal box is perfect)
Drinking straw
2 m piece of wool or string
What to do
If you’ve sketched the template, begin by colouring in Santa! Cut two 5 cm pieces of drinking straw. Stick them to the back of the template, in the places shown here. Thread the wool up through one straw towards Santa’s head, then down through other towards his feet. Tie a bead or washer to each end of the wool or string. Loop the tread over a picture hook or door handle. Move Santa to the bottom of the string and grasp one end of the string in each hand. Pull one hand straight down, letting the other hand move upwards. Alternate hands like this to make Santa climb the ‘chimney’!
Galloping reindeer
 What to put in the kit:
Reindeer template – drawn or printed on to thin card (an old cereal box is perfect)
Three pieces of string or wool
Two paper fasteners
What to do
If you’ve sketched the template, begin by colouring in the reindeer and its legs. Make a small hole in each spot marked by a cross. Punch or poke a larger hole in each set of legs, in the place marked with a circle. Attach each pair of legs by pushing a paper fastener through the front of Rudolph’s body, then through the hole on the leg. Turn Rudolph over so he is face down, and arrange the legs so they are pointing straight down. Tape the short piece of string between the legs, one end taped to to the top of each pair of legs as shown here. (Make sure you don’t tape the legs to the body!) Tie the longer piece of string to the centre of the short piece, so it hangs down.
Finally, tape a loop of string on to Rudolph’s back so you can hang him on a wall or door. Pull the long string to make him gallop – jump to the end of this page to see the reindeer in action!
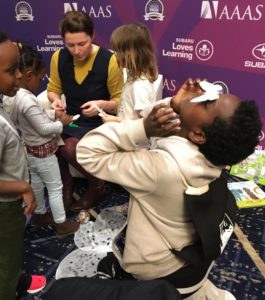
Magical hovering moth
What to put in the kit:
Balancing moth template drawn or printed on thin card (e.g. an old cereal box)
Two paperclips
What to do
Begin by colouring in and decorating your moth. Slide one paperclip onto each wing tip. Place the very tip of the moth’s head on on a finger tip, pencil tip or your nose – and see if you can make it hover! Where else can you make it balance? The photo was taken right at the start of 2020, at a joyful day of reading and making moths at the AAAS family fun day in Seattle.
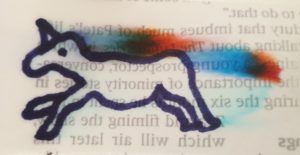
Rainbow unicorn bookmark
What to put in the kit:
Bookmark cut from paper that soaks up water well (e.g. art paper, filter paper or newspaper)
Black permanent marker
Black non-permanent felt tip
What to do
Use a black permanent marker to draw a picture at one end of the rectangle, around 1 cm from the end. Use a black non-permanent felt-tip to draw a small part of the picture e.g. the hooves or mane. Stand the paper in a cup with 1 cm of water. Watch as the water travels up the paper… and rainbow colours appear, as if by magic! What other magical animals can you create?
Star in a jar
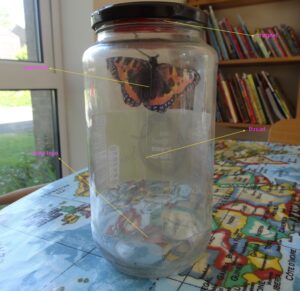
Replace butterfly with a paper star or reindeer!
What to put in the kit:
Small piece of very thin paper
Paperclip
Small magnet
Clean jar with lid (jar should be large enough to get your hand in)
Thread
What to do
Draw, cut and colour a small paper star (small enough to fit in your jar without touching the sides). Knot a length of thread onto the paperclip, then slip the paperclip on to the star. Trim the thread so the total length of thread and star matches the height of the jar. Turn the jar upside down. With your hand inside the jar, tape the free end of the thread to the base of the jar. The star should hang down 1 to 2 cm from the neck of the jar. Pop the magnet inside the lid of the jar (if the lid is not magnetic, tape it on). Screw the lid on, while holding the jar upside down. Slowly turn the jar the right way up again and watch your star hover!
Other quick Christmas ideas using household items!
Flying tea lantern – turn an empty tea bag in to a tiny flying lantern (nb this video was taken in a science classroom, but don’t do this inside your home, work outdoors)
Rainbow star – adapt this popular science-art activity by arranging your Skittles into a star shape… and using only red and green to make it extra Christmassy!
Pipe cleaner decoration – design your own decorations and watch crystals ‘grow’ over time; Steve uses Borax for speed but you can also try with a saturated sugar or salt solution (i.e. dissolve as much sugar or salt in hot water as you can, the let it cool before little hands go near it). The results with salt or sugar take longer to appear but can be very pretty.
About the book
Have you spent all year dreaming of turkey, tinsel and Christmas trees? Christmas is FAR too important to leave to the adults to get right – so take control and create your OWN Christmas!
- Make a sleigh launcher to start Christmas with a whizz
- Paint a festive scene with Christmas dinner leftovers
- Have a snowball fight, even when there isn’t any snow
- Build your own Christmas cracker to start your celebrations with a BANG
And loads more inventive and exciting activities. This book will have you tearing, folding, cutting, experimenting and scribbling, as you create your very own Christmas!
It’s 1 December and at last it’s time to CREATE YOUR OWN CHRISTMAS!!! 🦌 #STEAM #STEM #createyourownchristmas @KatieAbey @bloomsbury https://t.co/A7HqGDTIG6 pic.twitter.com/iOeTXZ7bll
— Isabel Thomas 🦊 (@isabelwriting) December 1, 2017